Download SuperLive Plus
Open the App Store (iPhone) or Google Play Store (Android) on your phone. Search for "SuperLive Plus" and tap Install (or the download icon).
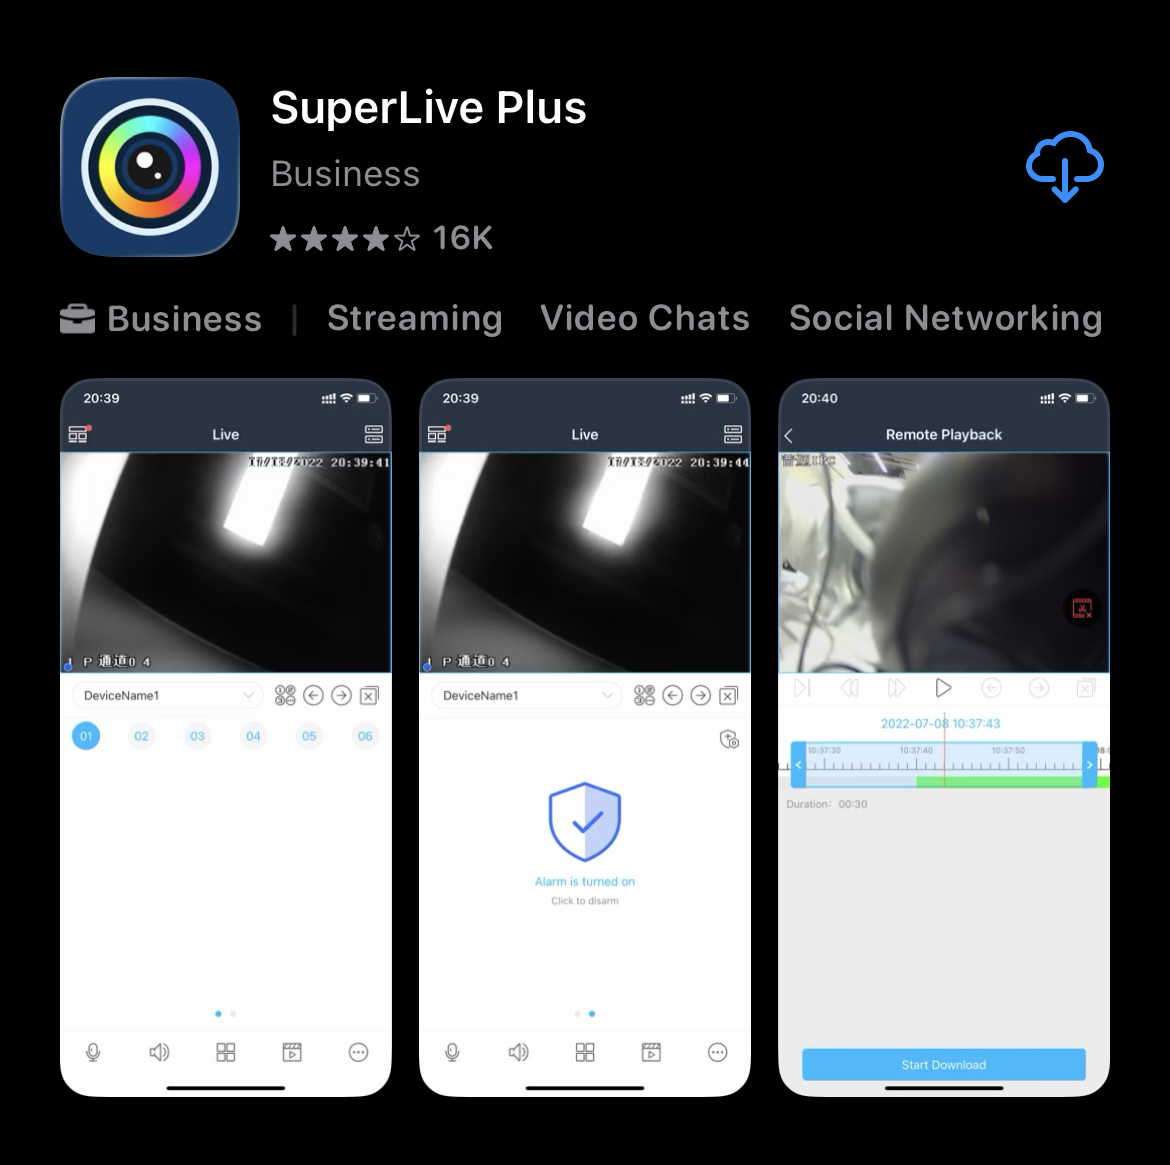
The app icon looks like a colorful camera lens.
Setup Guide: Download, Install & Add Your Camera Recorder (NVR/DVR)
Download & Install the App
Open the App Store (iPhone) or Google Play Store (Android) on your phone. Search for "SuperLive Plus" and tap Install (or the download icon).
The app icon looks like a colorful camera lens.
First-Time App Setup
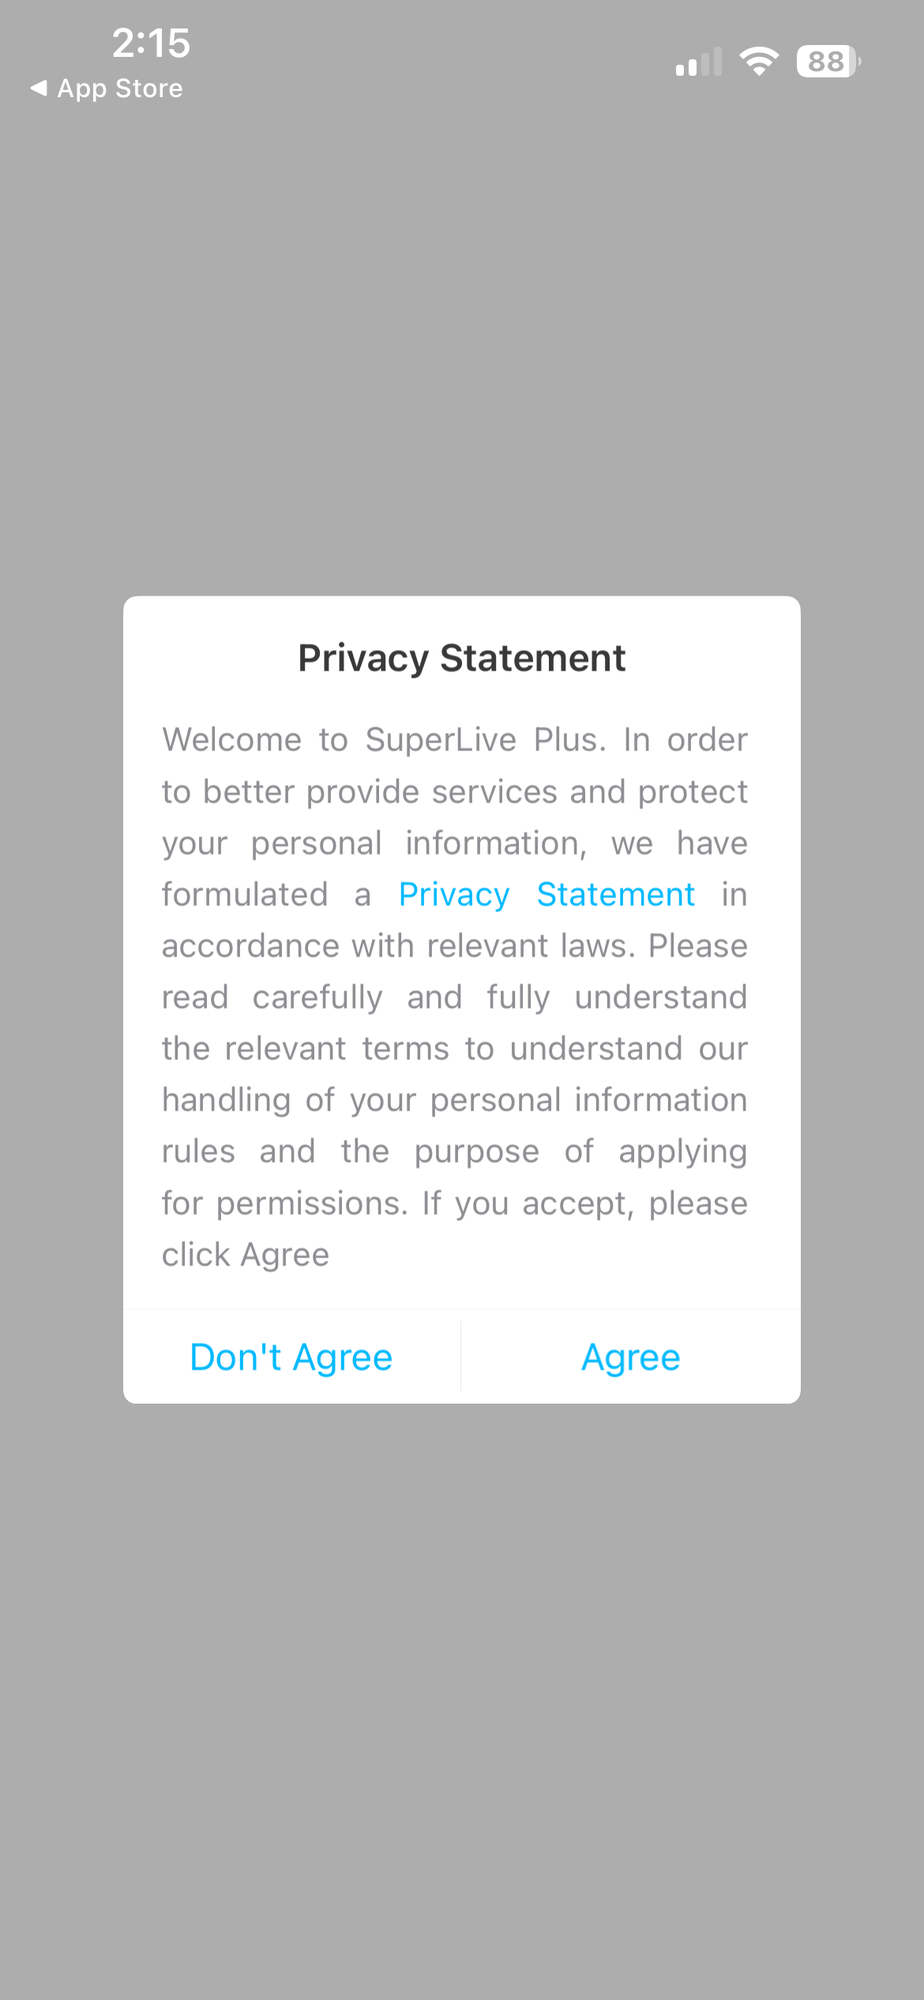
When you first open the app, a Privacy Statement will appear. Read it if you'd like, then tap "Agree" to continue.
You will see an "Account Mode" screen. You do not need to create an account. Tap "Skip" in the top-right corner.
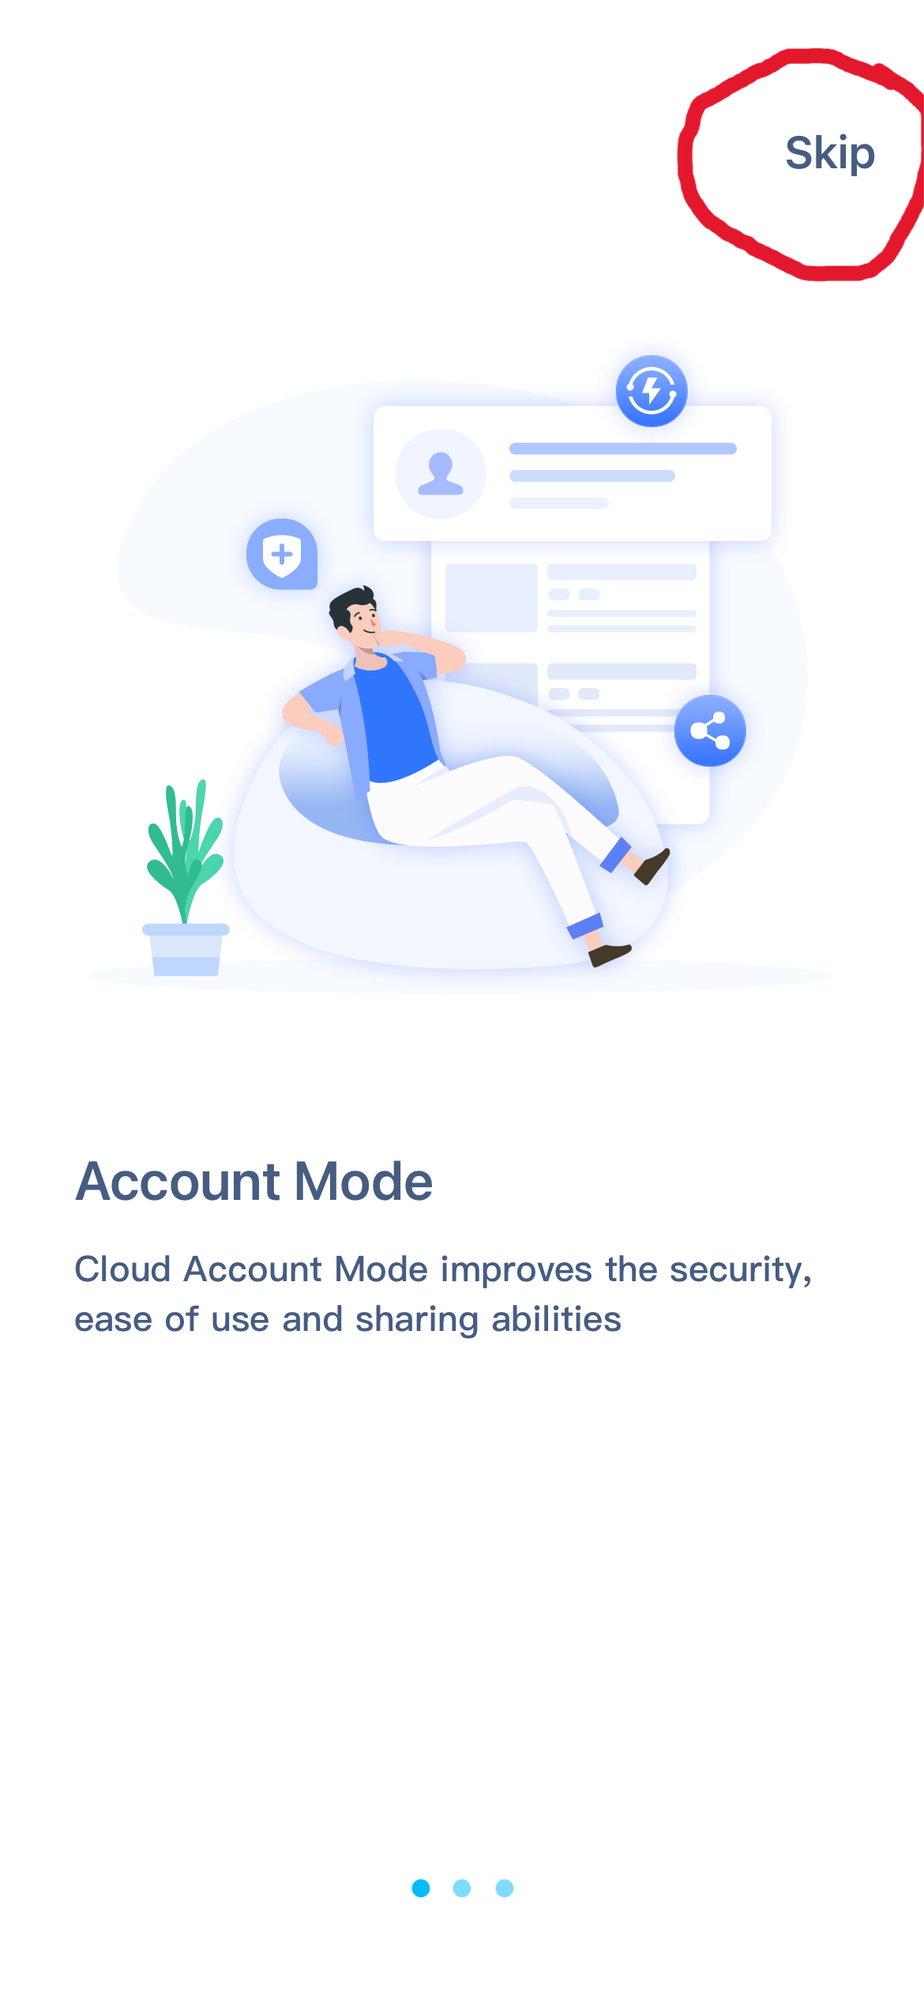
Tap the "Skip" button (circled in red).
On the "Share your devices" screen, tap the "Start" button at the bottom-right.
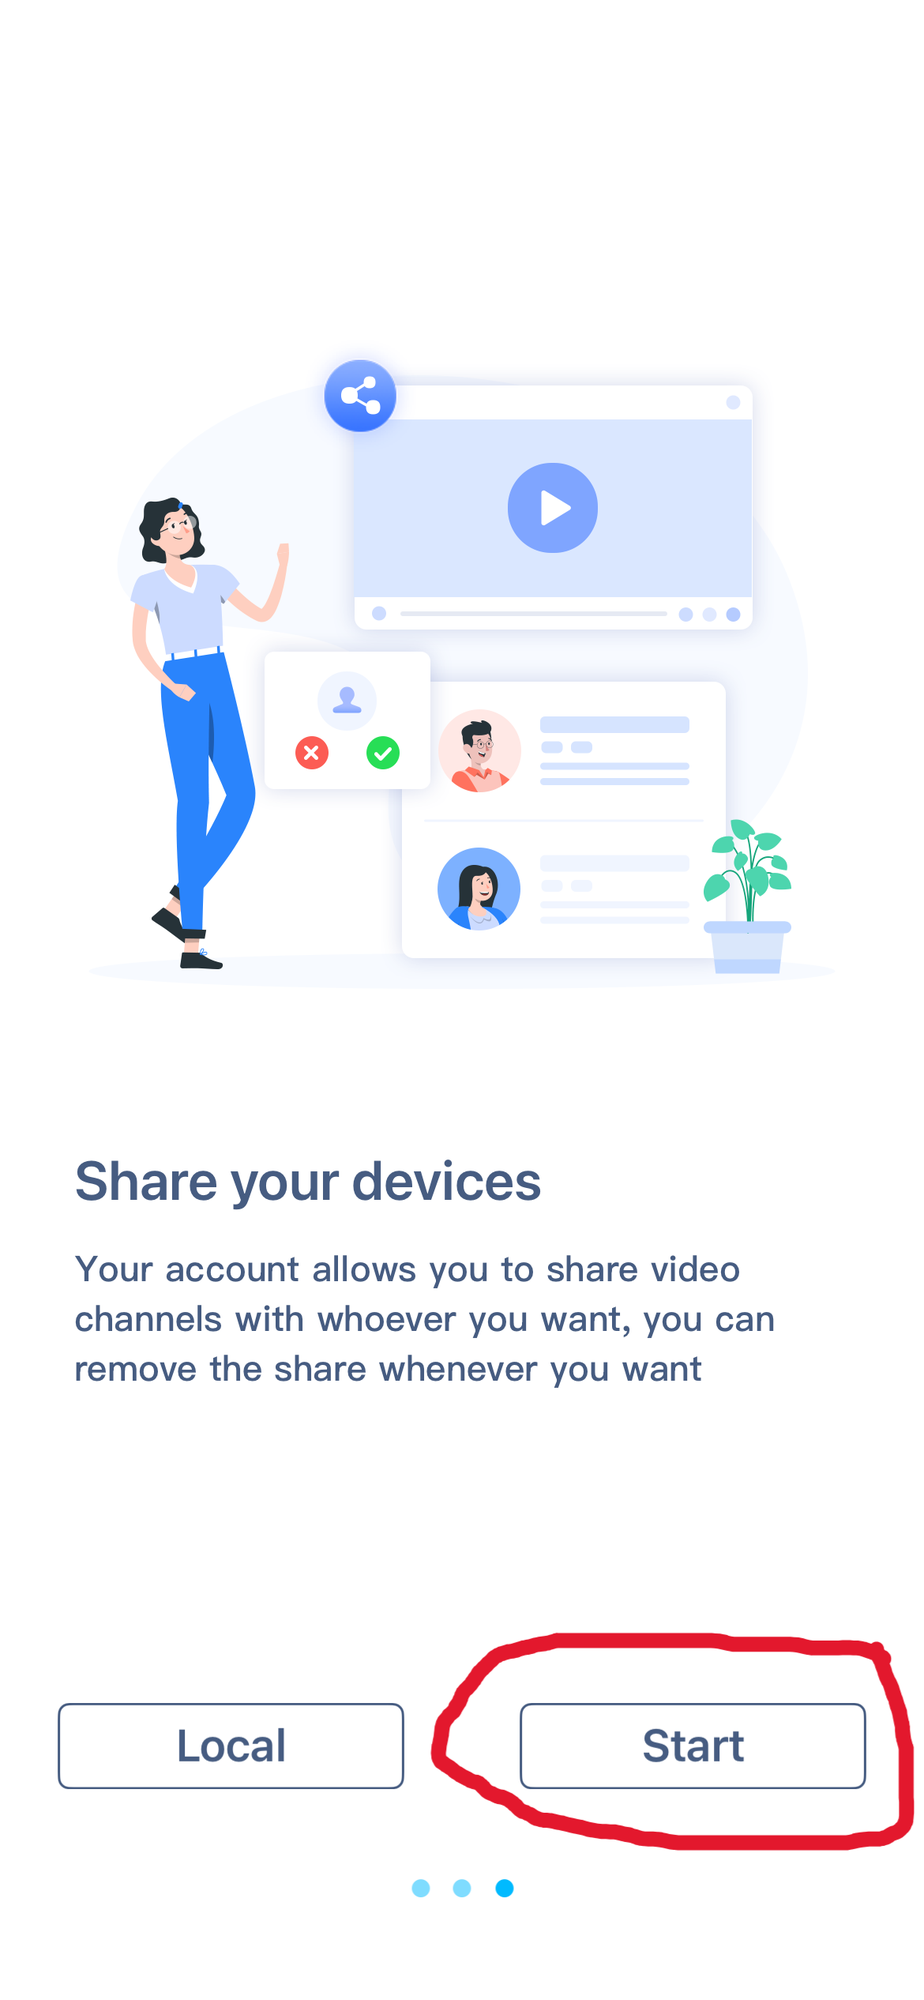
Tap the "Start" button (circled in red).
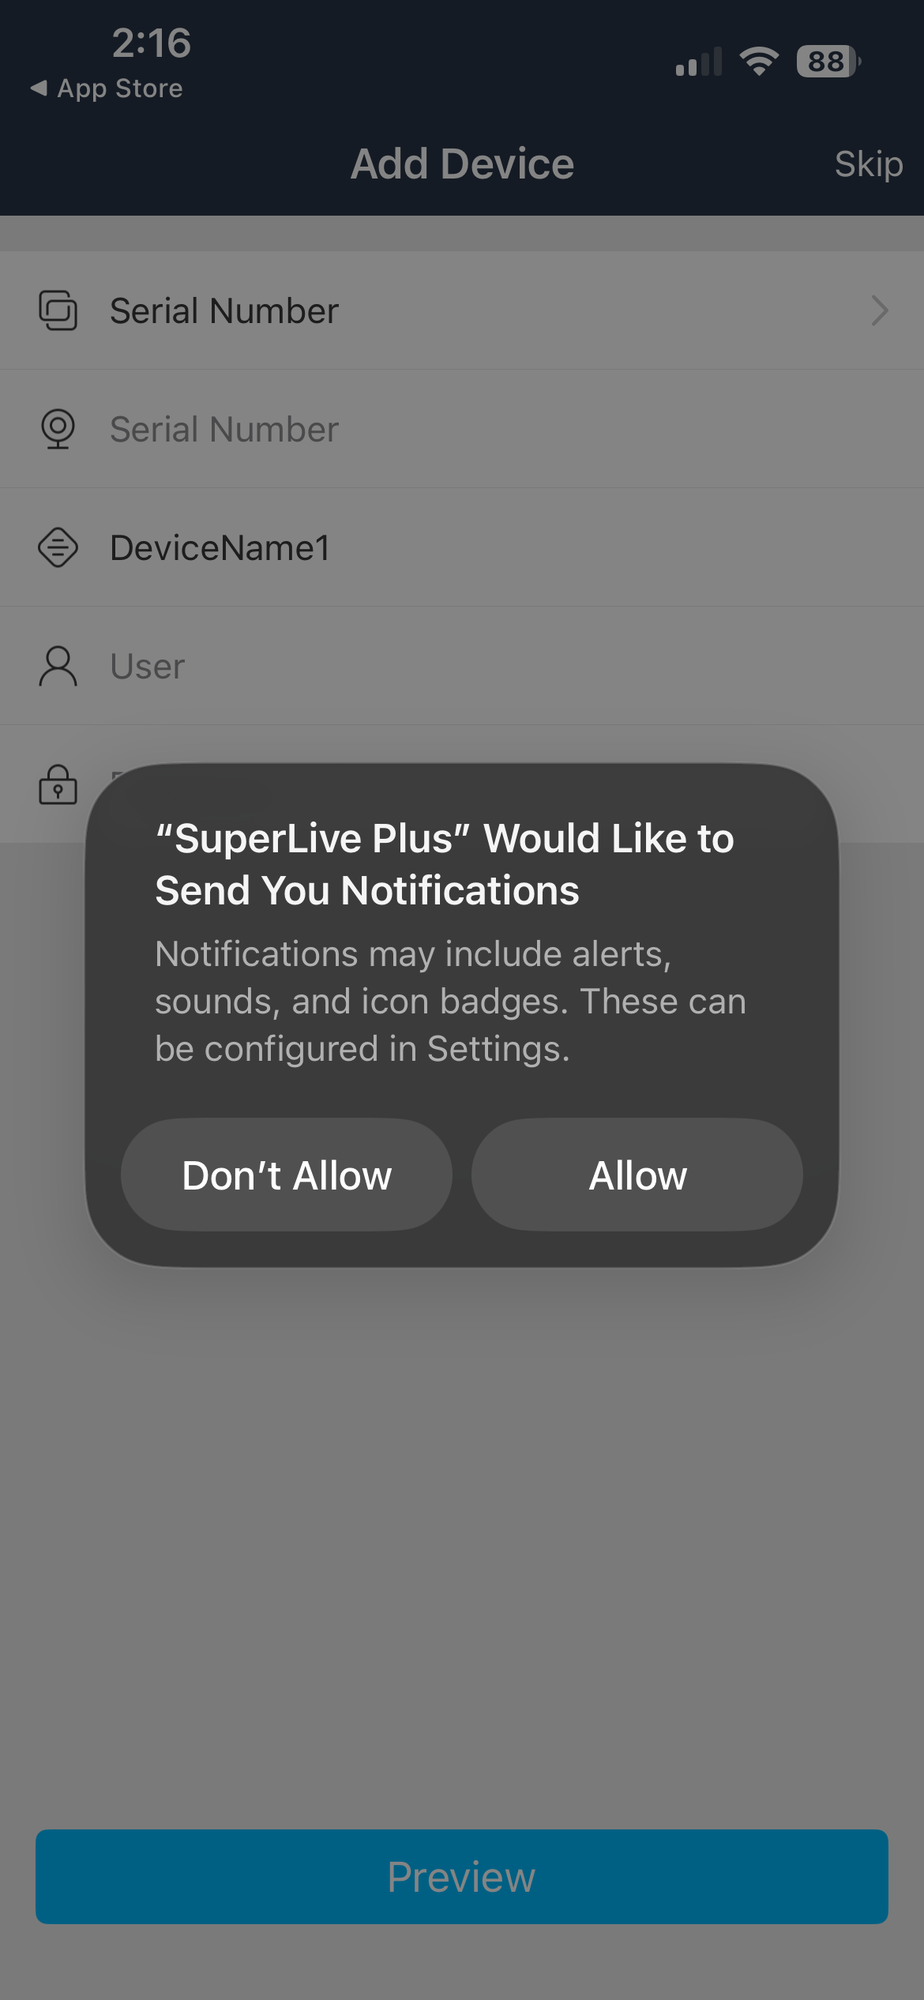
If a popup asks "SuperLive Plus Would Like to Send You Notifications", tap "Allow". This lets you receive camera alerts.
An "Add Device" screen will appear. Do not fill anything in here. Tap "Skip" in the top-right corner. We will add the device properly in Part C.
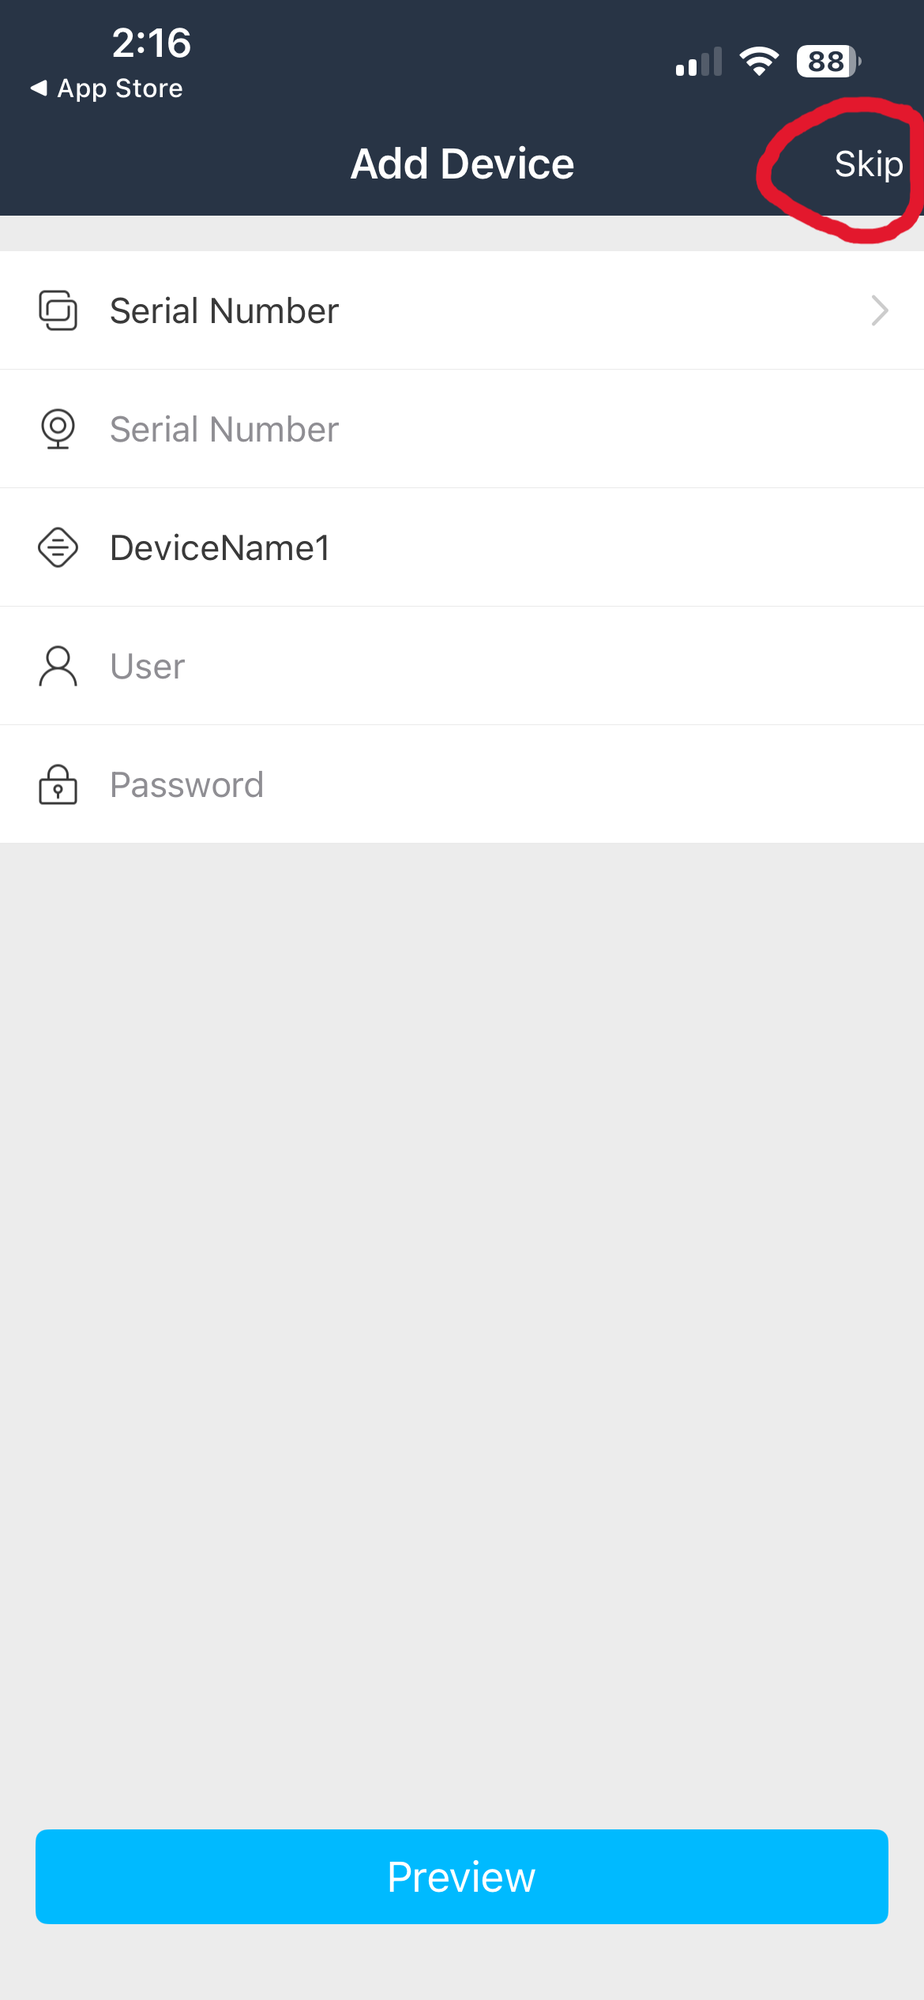
Tap "Skip" (circled in red). Do not enter anything here.
Add Your Camera Recorder (NVR/DVR)
You should now see the Live screen (with a dark/empty video area). Tap the menu icon in the top-left corner (it looks like a small grid of squares).
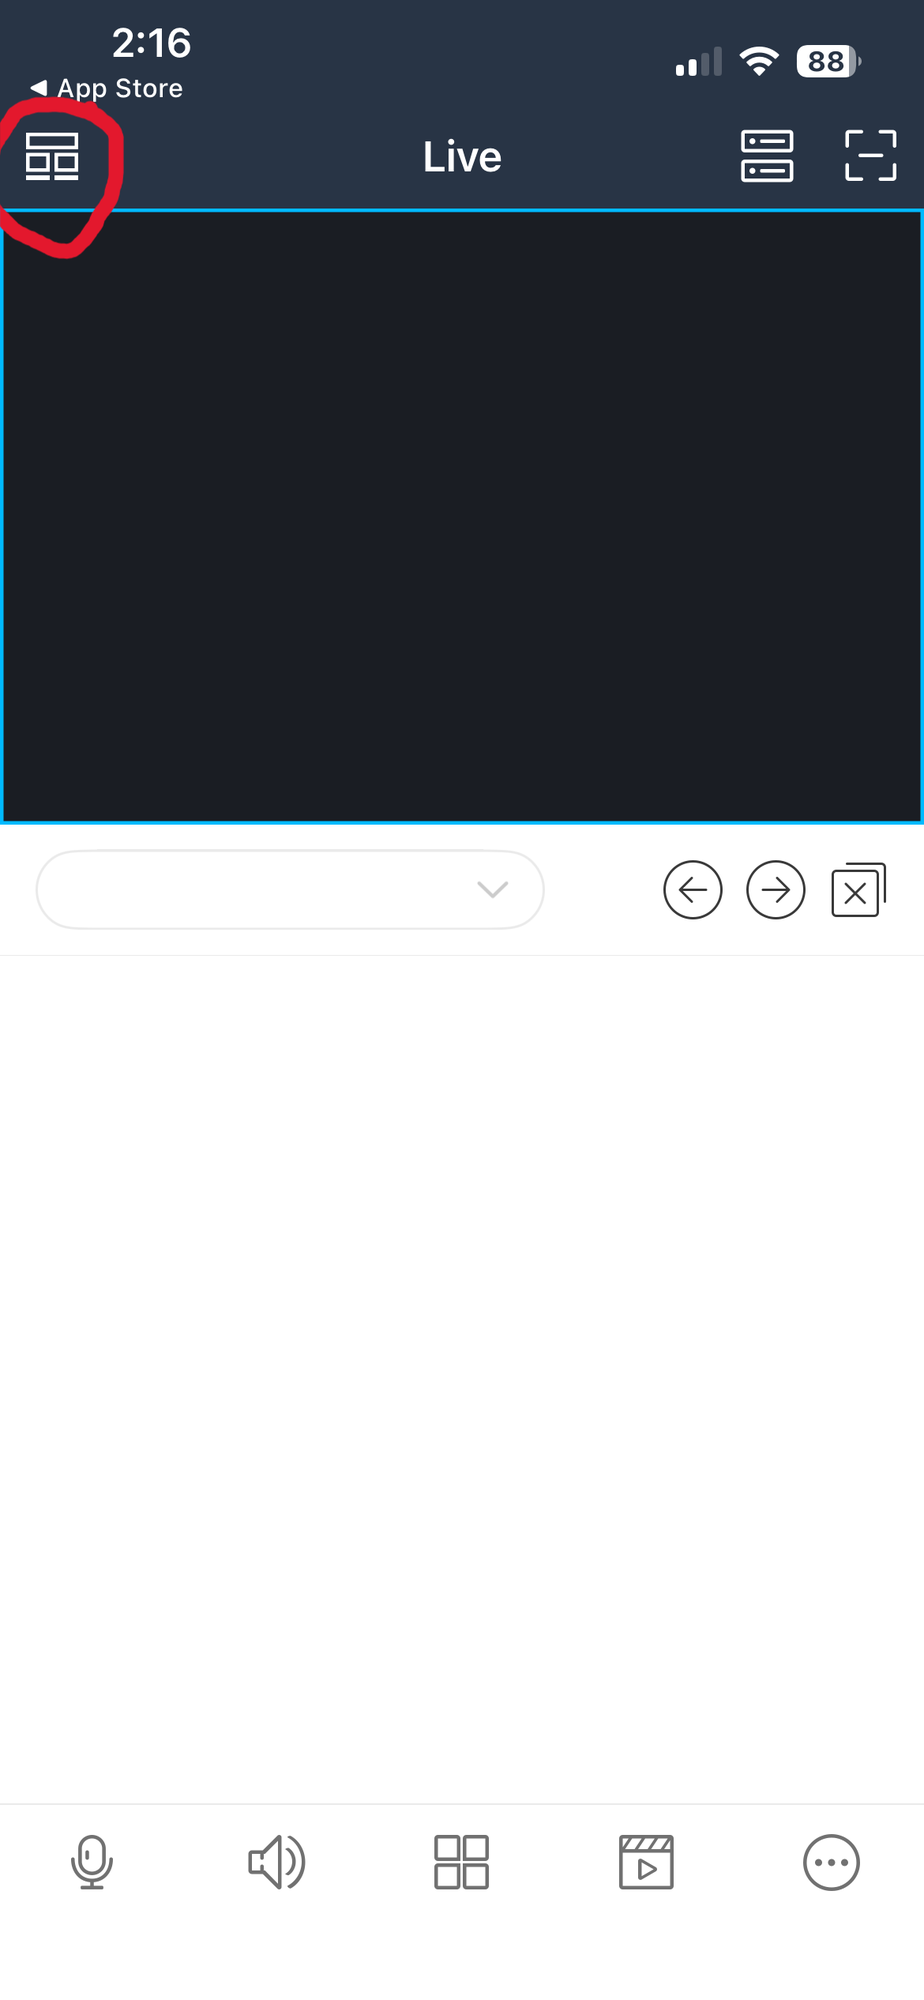
Tap the menu icon (circled in red) in the top-left.
A side menu will slide open. Tap "Device List".
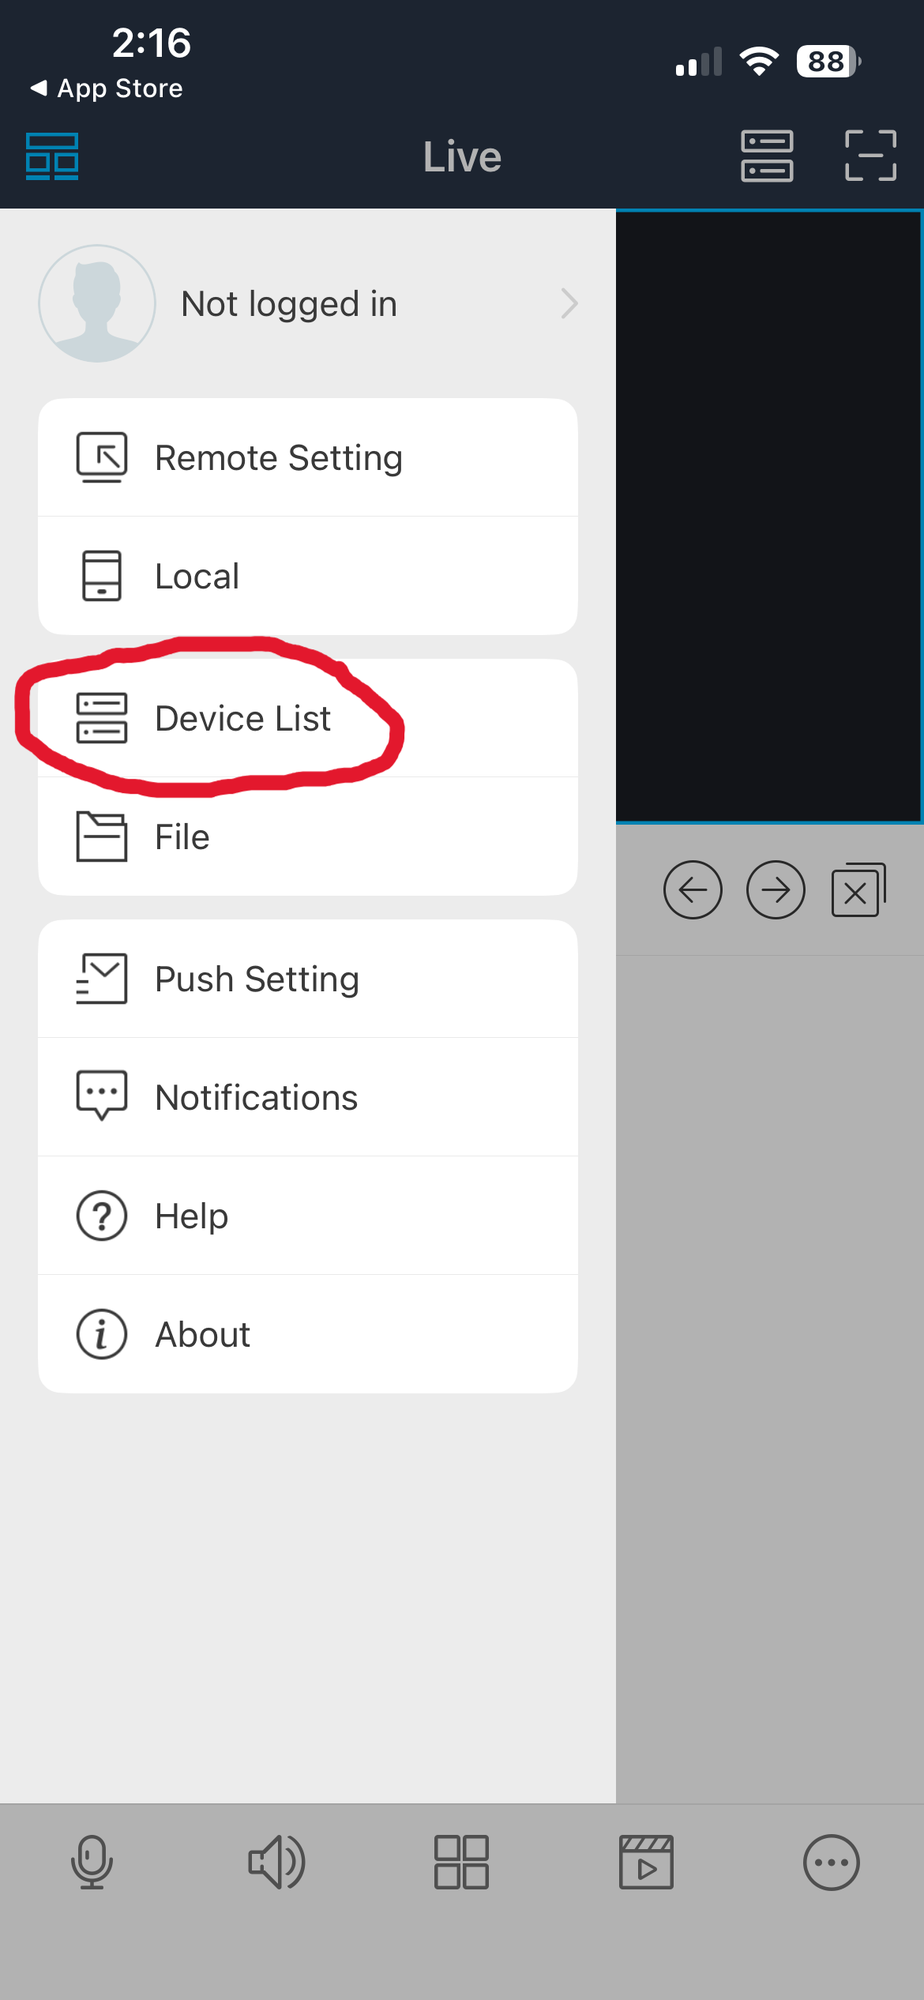
Tap "Device List" (circled in red).
On the Device List screen (which will be empty), tap the "..." button (three dots) in the top-right corner.
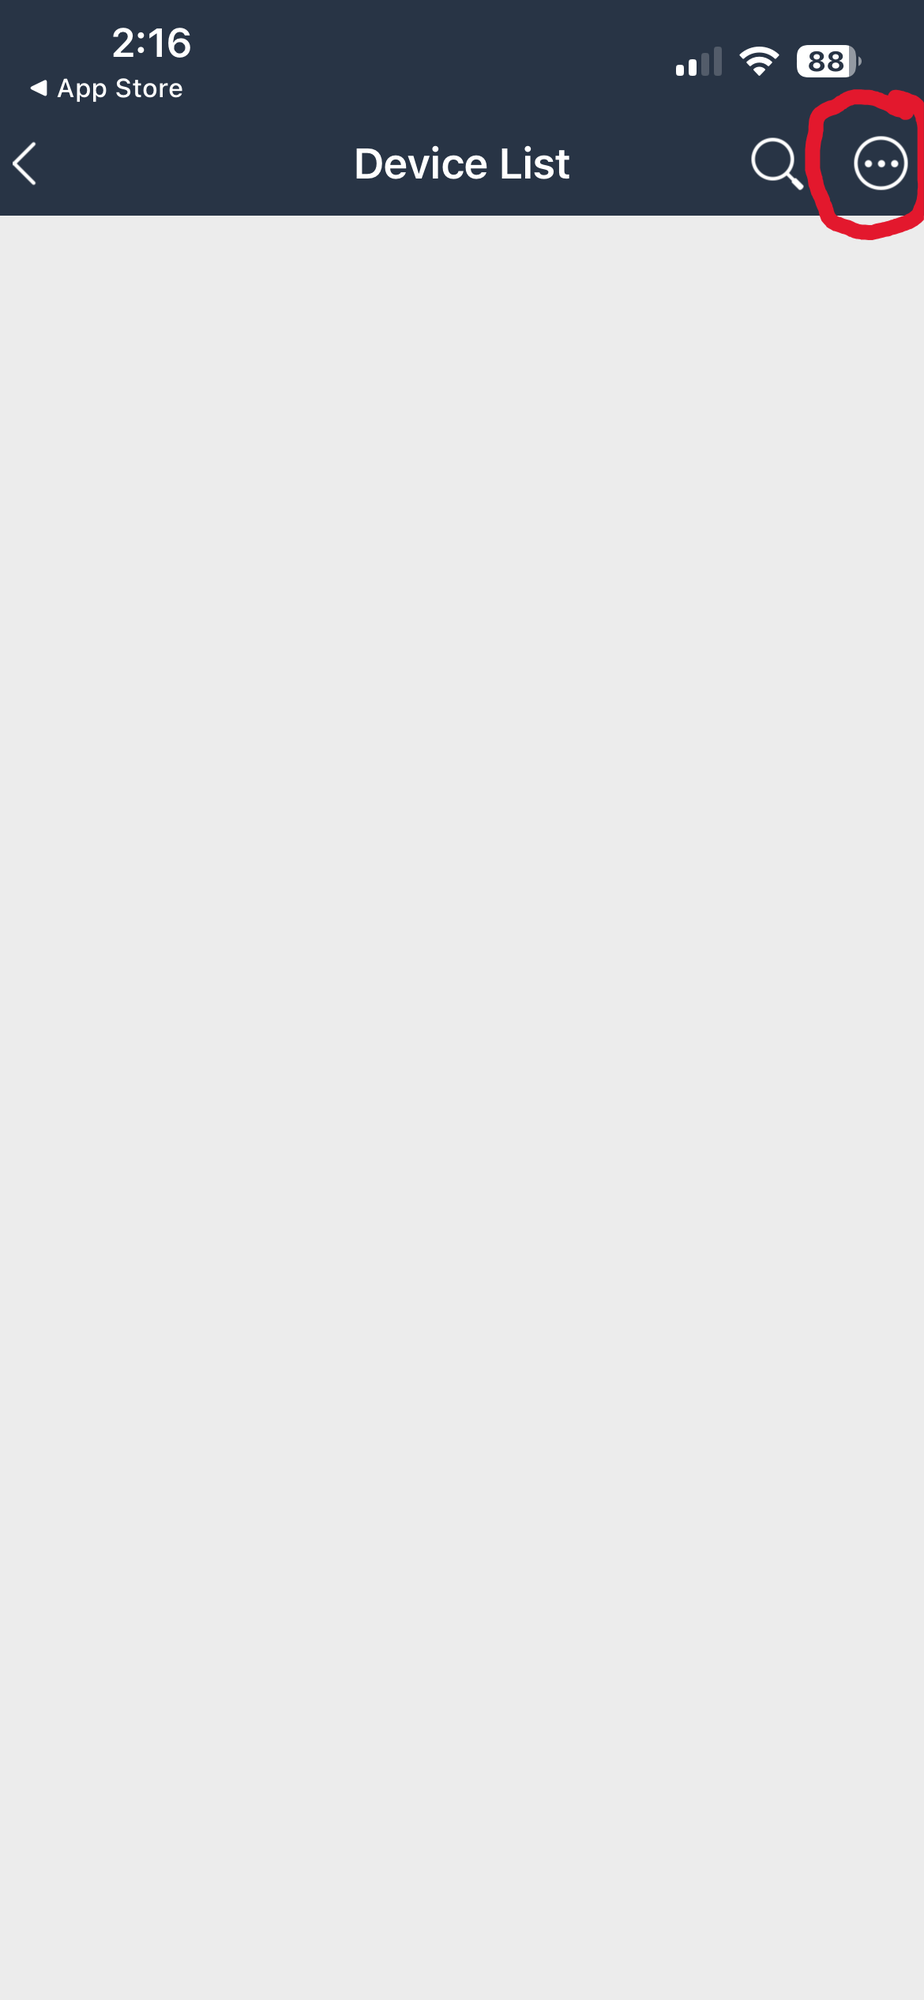
Tap the "..." button (circled in red) in the top-right.
A dropdown menu will appear. Tap "Manually Add".
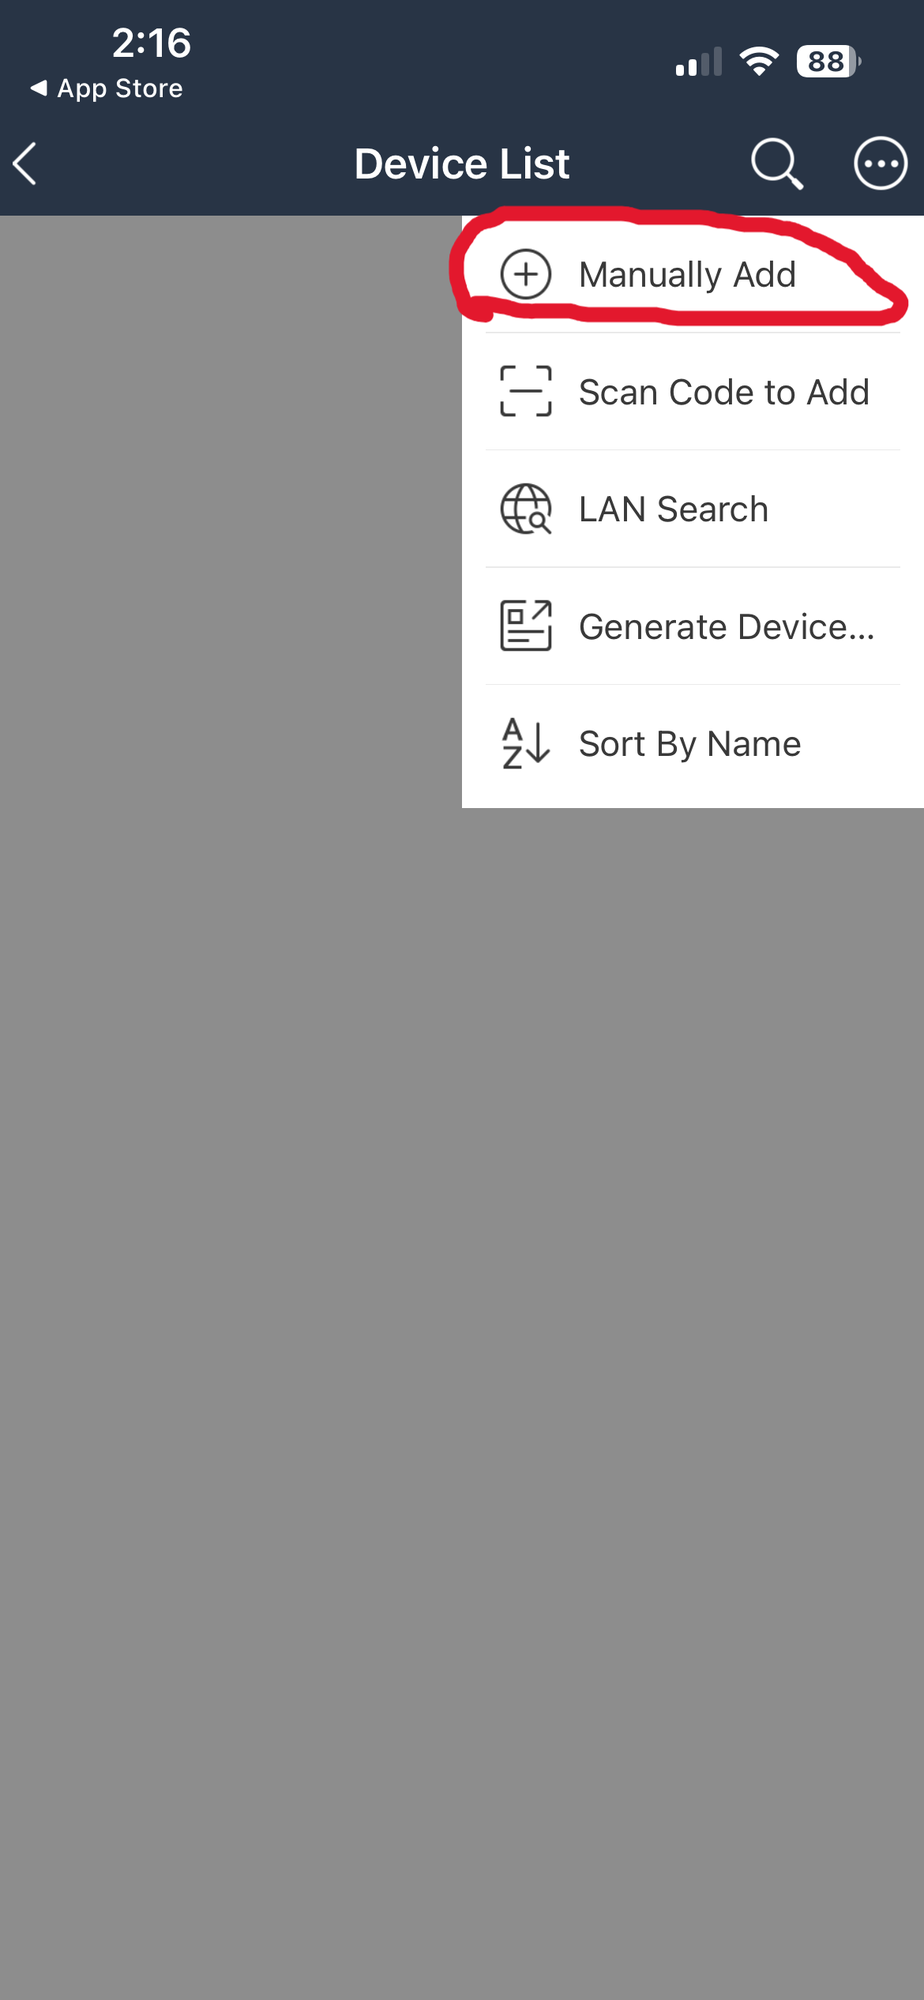
Tap "Manually Add" (circled in red).
The Add Device screen will appear showing "Serial Number" mode. You need to switch it. Tap the "Serial Number" row at the very top (with the arrow on the right side).
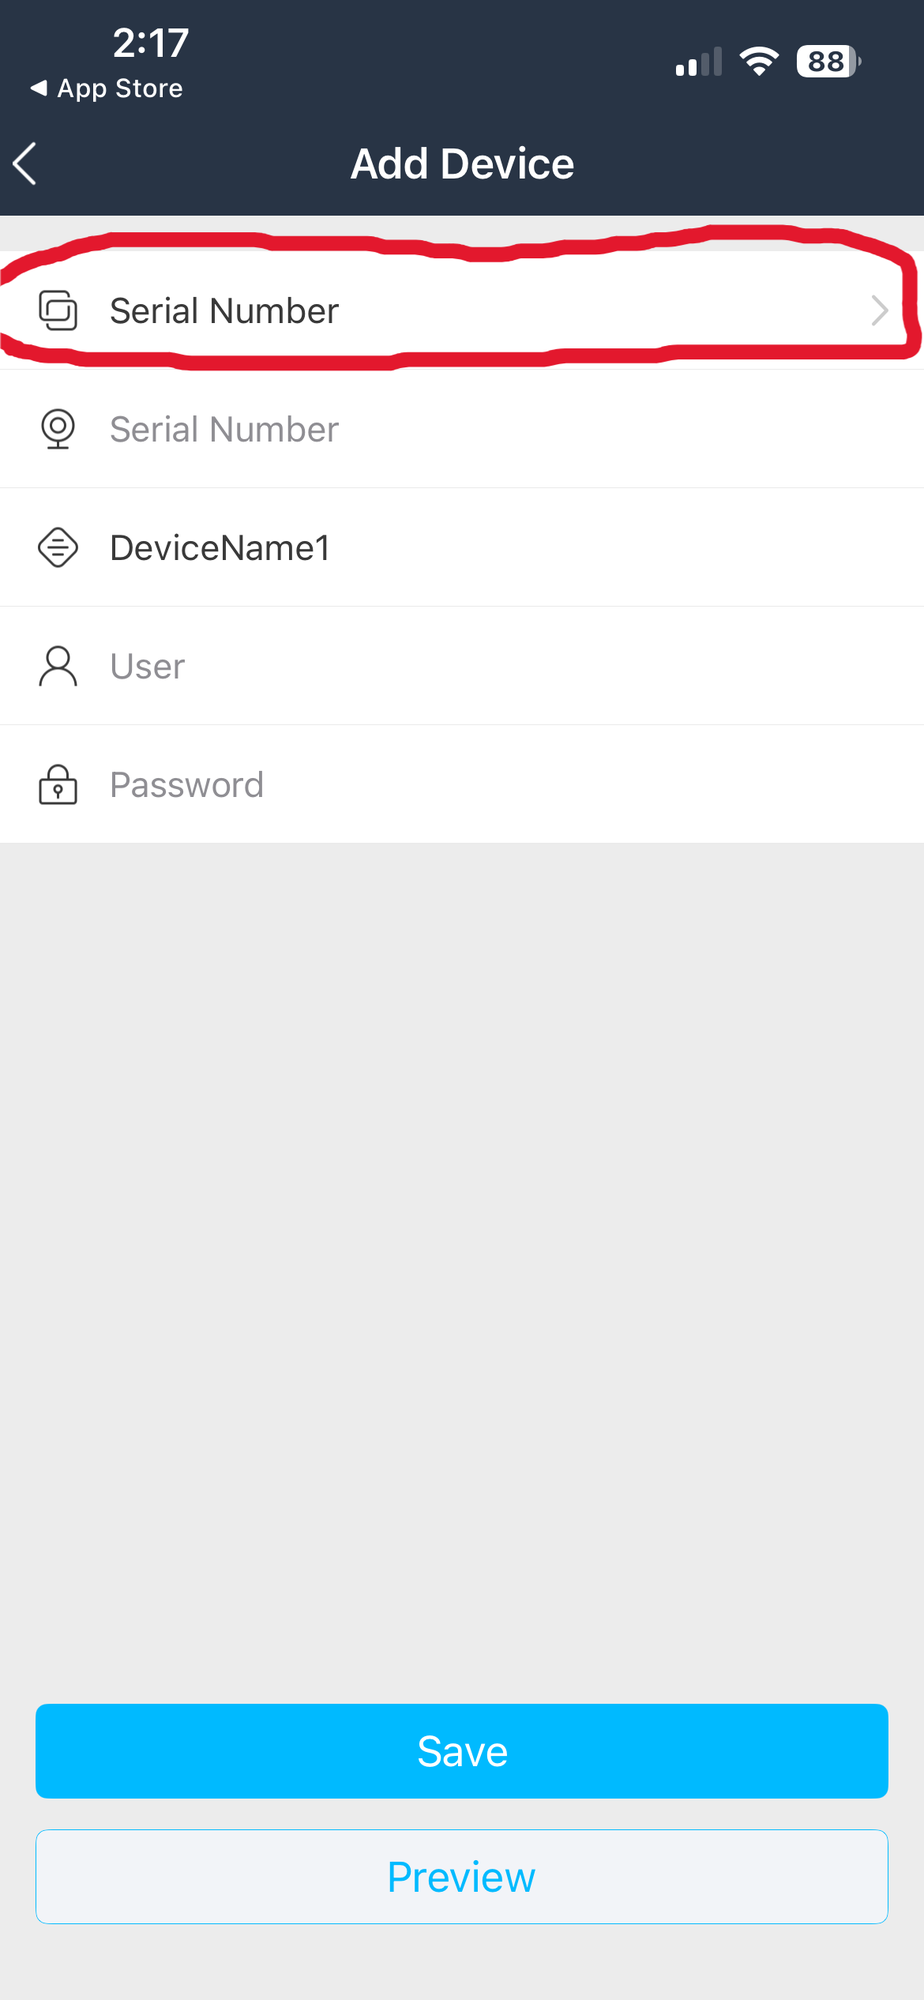
Tap the "Serial Number" row (circled in red) to change mode.
A small menu will pop up at the bottom. Tap "IP/Domain Name".
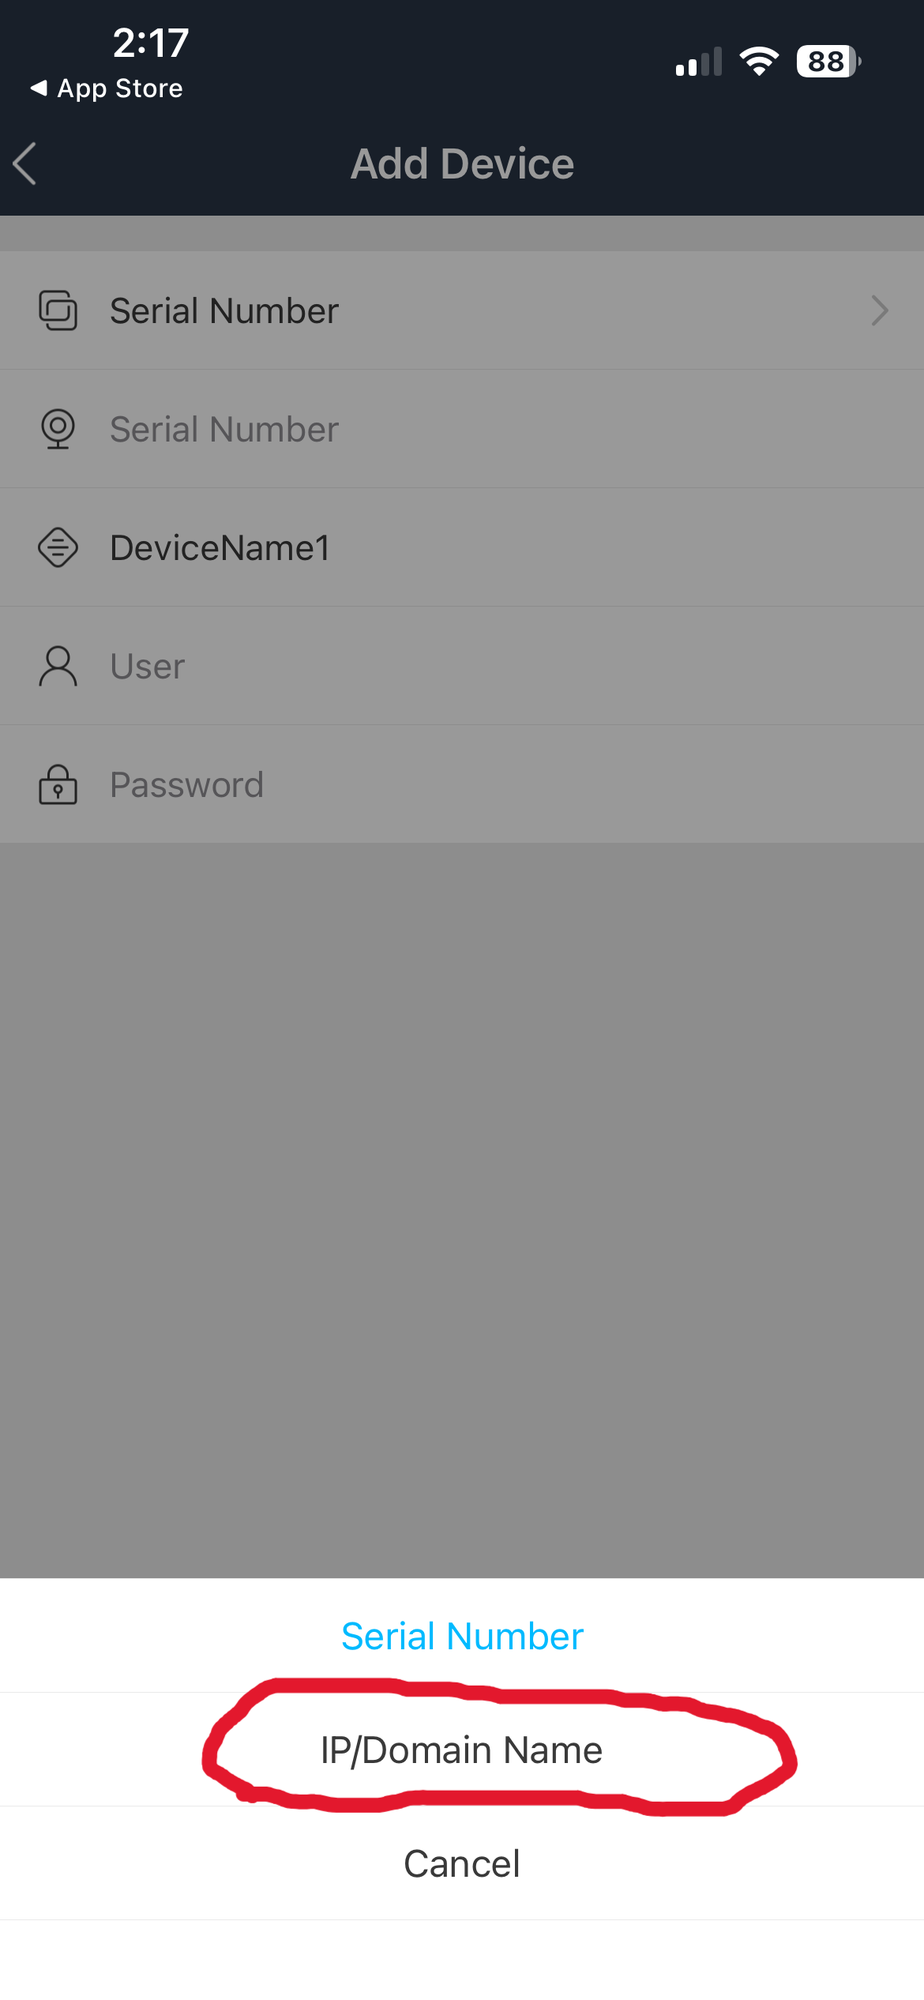
Tap "IP/Domain Name" (circled in red).
Now fill in the form using the login credentials you received from your service provider. Here is what goes in each field:
| Field | What to Enter |
|---|---|
| IP/Domain Name | The domain name from your provided credentials (for example: 48east132.autoddns.com) |
| HTTP Port | 9000 |
| Nickname | A name for your camera recorder (you can use anything you like) |
| User | The username from your provided credentials |
| Password | The password from your provided credentials |
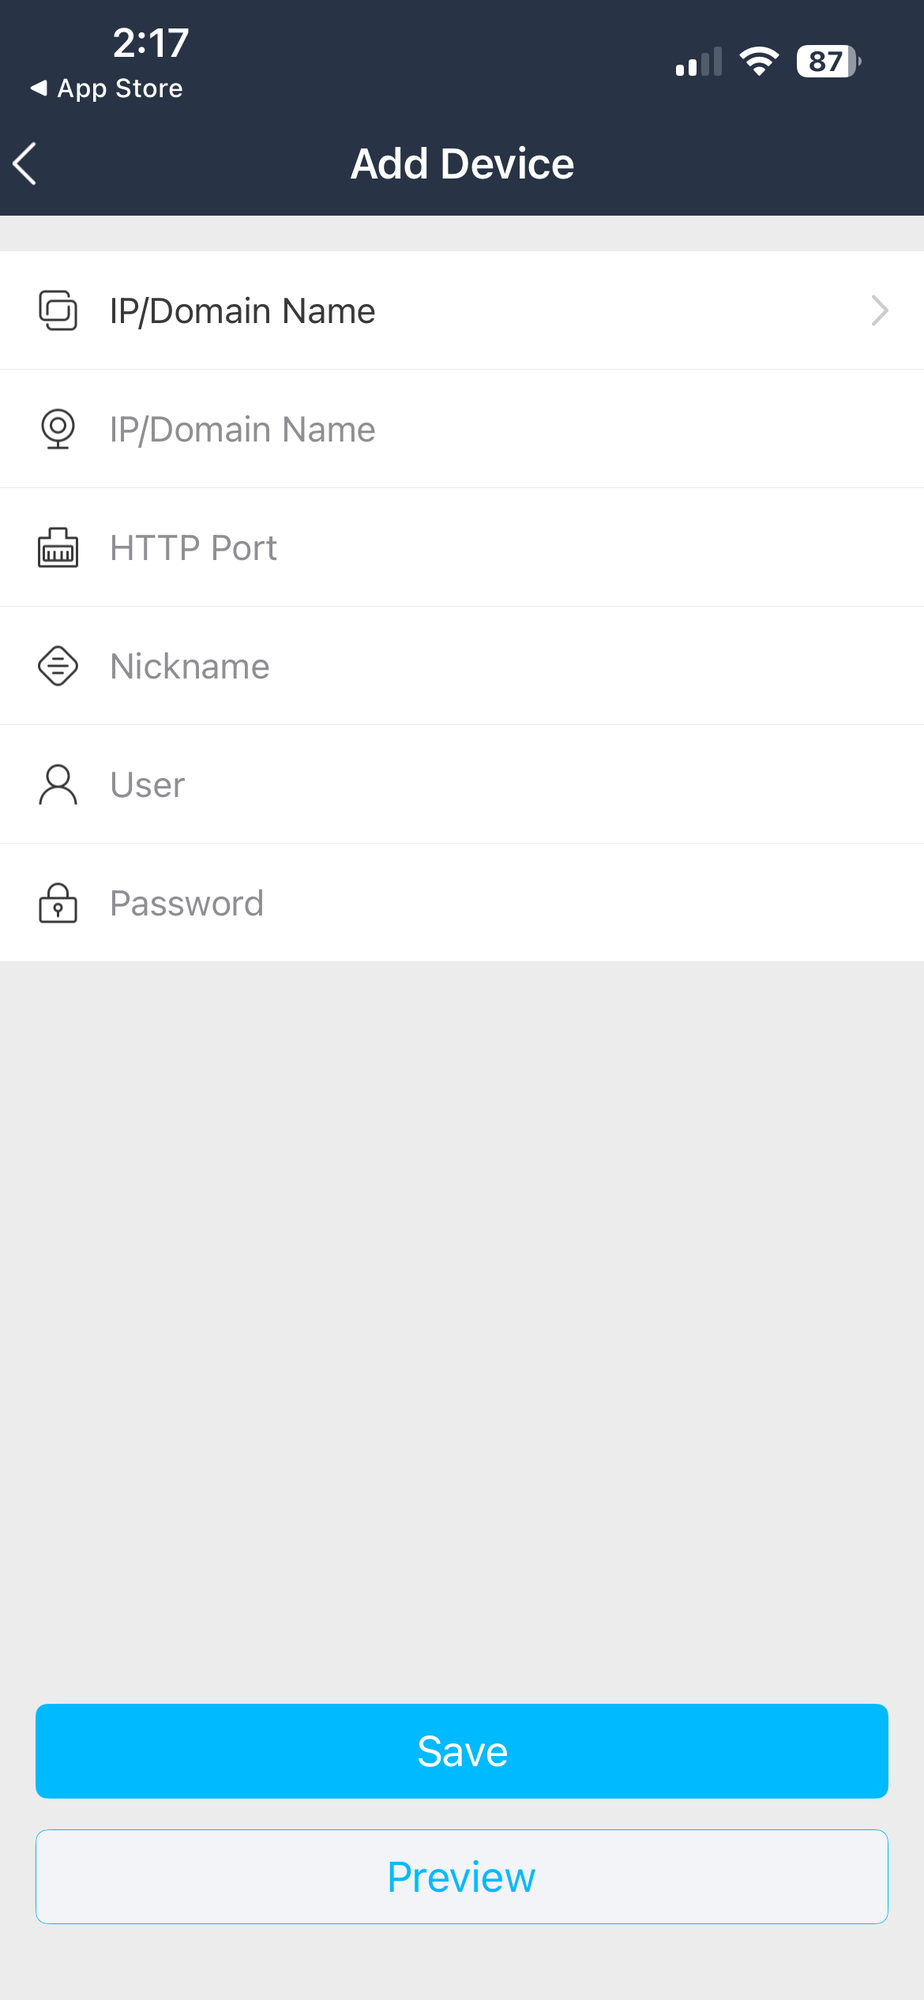
The empty form. Fill in each field as described above.
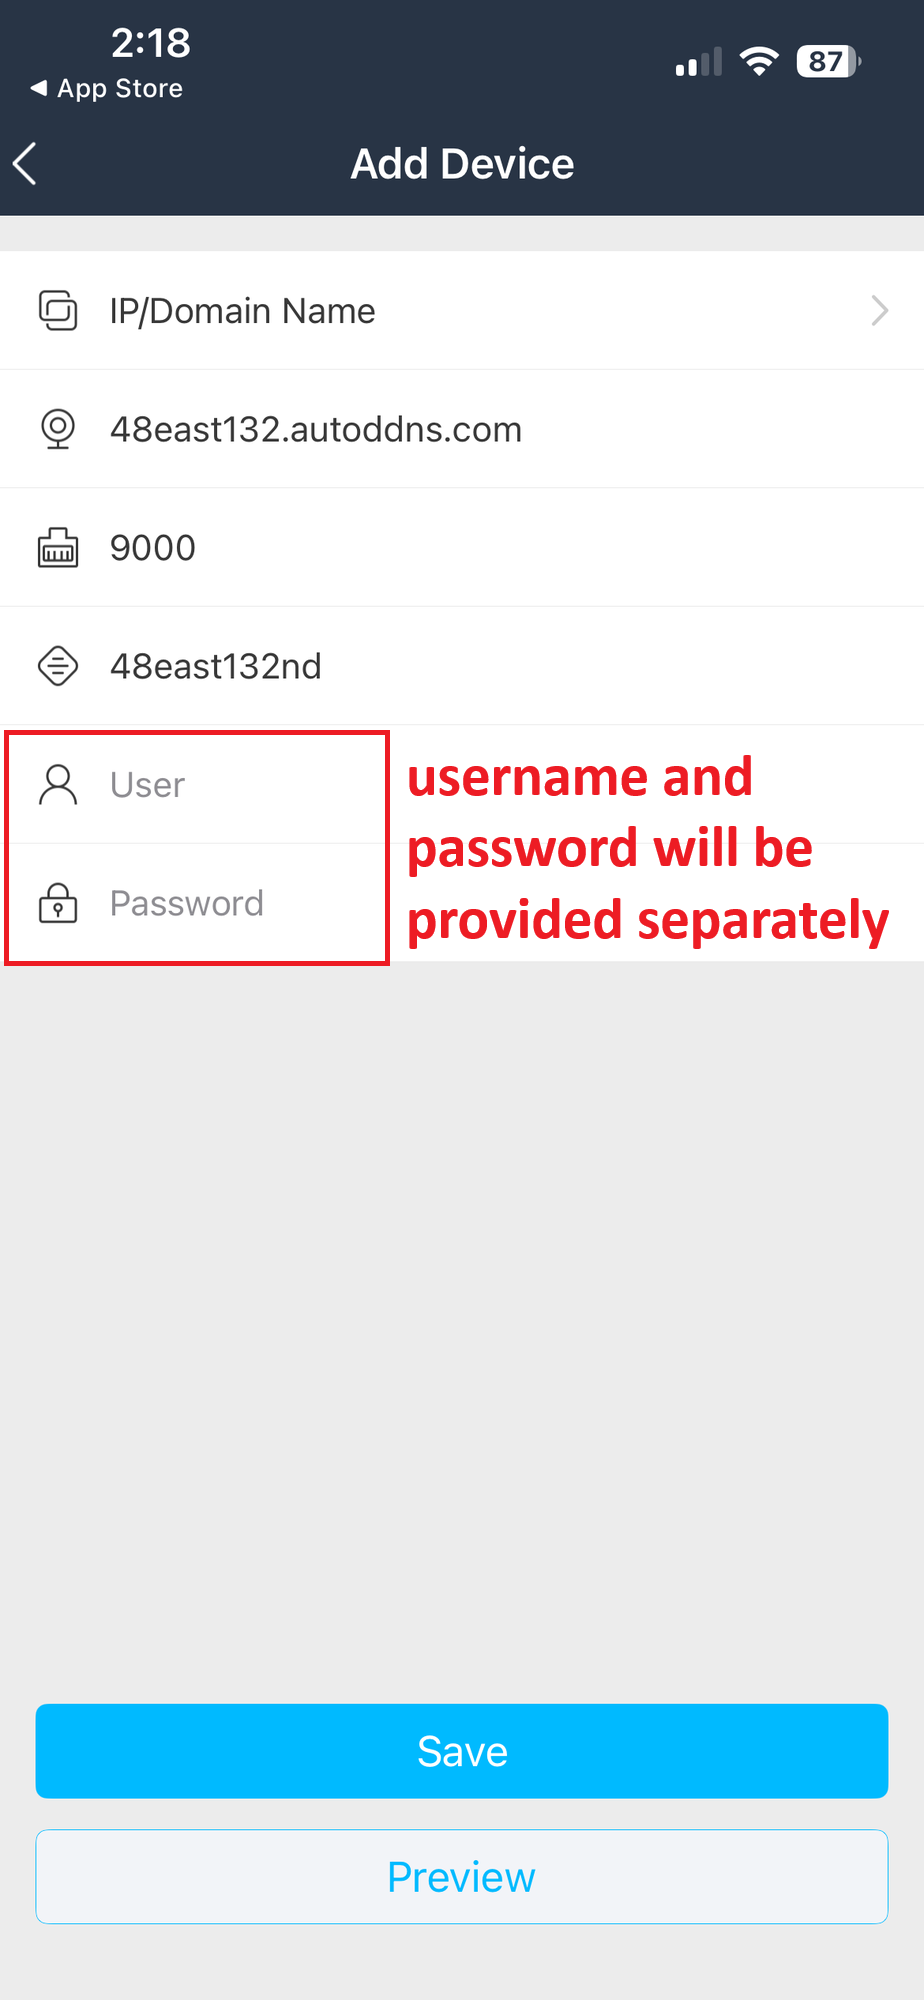
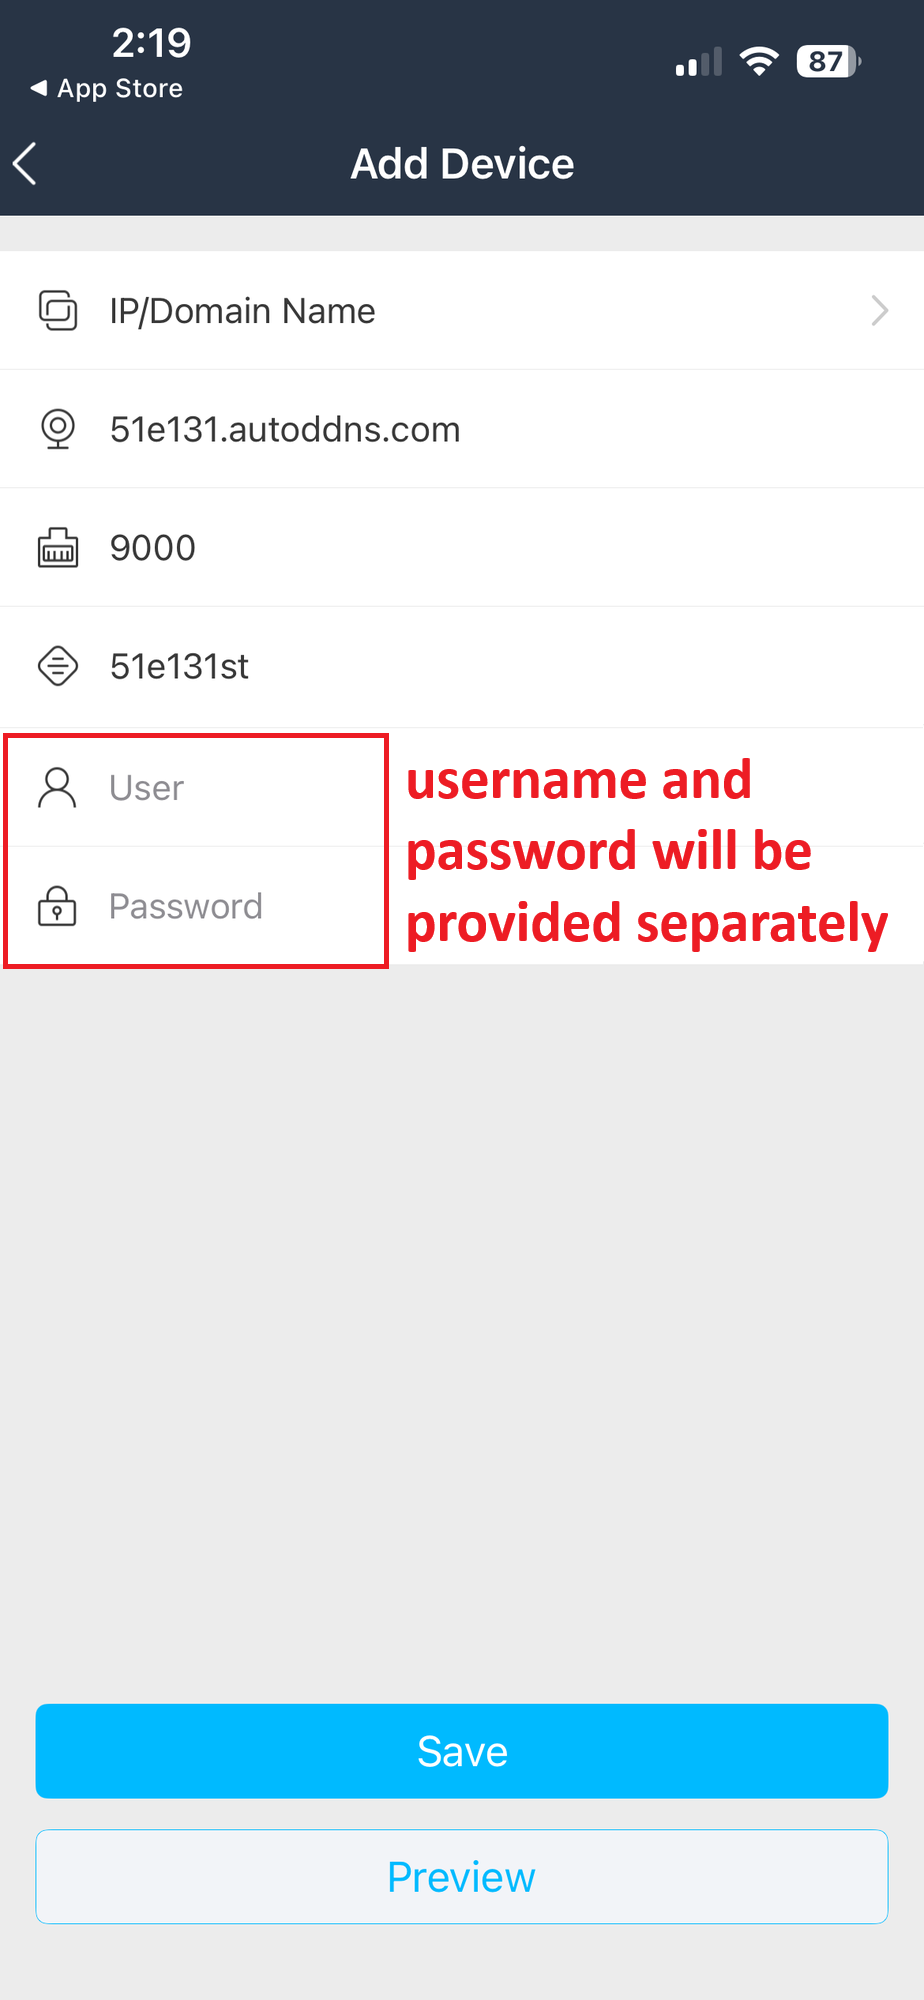
Two examples of completed forms. Your information will be different.
After filling in all the fields, tap the "Save" button (blue). Your camera recorder will be saved. You can then tap "Preview" to see a live view from your camera recorder.
If you have trouble connecting, double-check that:
If it still doesn't work, please contact your camera recorder provider for assistance.